Table of Contents
ToggleA dishwasher air gap isn’t just a recommendation, it’s a code requirement in most jurisdictions, yet many homeowners don’t understand what one does or why it matters. If you’ve ever noticed a small cylindrical device on your kitchen counter near the sink, or if your building code requires one but you haven’t installed it yet, this guide walks you through the entire process. Installing a dishwasher air gap is a straightforward project that protects your dishwasher from drain backflow and prevents contaminated water from re-entering clean dishes. It typically takes 30 to 60 minutes and requires only basic tools, making it one of the most practical kitchen upgrades a DIYer can tackle.
Key Takeaways
- A dishwasher air gap installation is a code-required safety feature that prevents contaminated water from backflowing into your dishes and typically takes 30 to 60 minutes with basic tools.
- The air gap must be positioned within 12 to 24 inches of the sink drain and requires only standard materials like hose clamps, a 1.5-inch hole saw, and silicone caulk to complete the project.
- Proper connection sequence is critical: dishwasher drain hose to the air gap’s upper inlet, then a short outlet hose from the lower port to the sink drain, with all connections secured using hose clamps.
- Test your installation by running a short rinse cycle and monitoring for proper water flow through the center tube and outlet hose, checking for leaks or clogs at connection points.
- Maintain your air gap with monthly exterior wipes, annual interior cleaning of the mesh screen, and semi-annual hose clamp tightening to ensure reliable long-term performance and prevent drainage issues.
What Is a Dishwasher Air Gap and Why You Need One
An air gap is a physical break in the drainage line between your dishwasher and the sink drain. Think of it as a safety valve, if wastewater backs up from your sink drain or septic system, the air gap stops that contaminated water from flowing back into your clean dishes. Without one, grease, debris, and bacteria can siphon backward into the dishwasher’s spray arms and tub, compromising both your dishes and your appliance’s longevity.
Most building codes, including the International Residential Code (IRC), require an air gap in residential kitchens. Some jurisdictions allow an alternative called a high loop (running the drain hose up and over a cabinet before descending to the sink drain), but an air gap is the gold standard because it’s more reliable and visible, you can see it working.
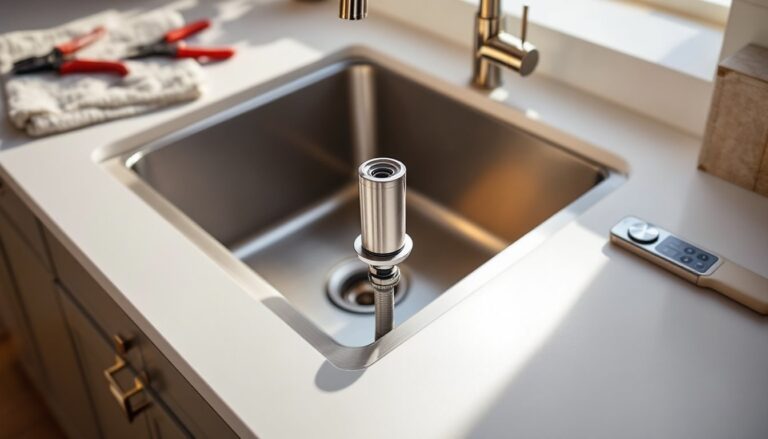
The air gap sits either on top of the sink rim or the countertop immediately next to the sink. When the dishwasher drains, water flows down through the air gap’s center tube into the opening below, which then connects to the sink drain. If pressure backs up, water exits through small holes on the outer chamber instead of flowing backward into the dishwasher. A dishwasher air gap diagram typically shows this design clearly: water enters from above, can exit sideways during a backup, and flows down into the drain below.
Gathering Your Tools and Materials
Before you start, gather everything on the bench. Most air gap installations don’t require specialized tools, but having the right kit makes the job cleaner and faster.
Materials:
• Dishwasher air gap (usually 3.5 to 4 inches in diameter, available at home centers or online)
• Stainless steel or brass hose clamps (two sizes, typically 0.75-inch and 1.25-inch wide)
• Dishwasher drain hose (if replacing: typically 0.75-inch inner diameter)
• Silicone caulk (optional but recommended for water-tightness around the rim or countertop hole)
• Plumber’s putty or caulk (for sealing around the air gap collar)
Tools:
• Adjustable wrench or socket wrench
• Flathead and Phillips screwdrivers
• Drill with a 1.5-inch hole saw (if drilling through countertop)
• Adjustable wrench or pliers (for hose clamps)
• Flashlight (for seeing under the counter)
• Towels (drainage work is wet)
Make sure your air gap is compatible with your dishwasher model and your countertop material. Most gaps fit standard 1.5-inch holes in laminate, solid surface, or granite countertops. If your counter is tile, a surface-mounted air gap avoids drilling through grout or ceramic.
How to Measure and Position Your Air Gap Correctly
Location matters. An air gap works best when positioned within 12 to 24 inches of the sink drain, close enough for gravity to work efficiently but far enough not to interfere with faucet handles or soap dispensers. Most installations place it on the right side of the sink (if you’re right-handed) or on the countertop immediately adjacent to the sink rim.
If drilling through the counter, measure twice. Mark the center point clearly, then dry-fit your air gap from above to confirm the collar sits flush against the counter surface. For laminate or composite countertops, drill slowly from the top side to avoid chipping the underside. If you’re installing on a sink rim (a less common but valid option), ensure the collar fits snugly in the 1.5 to 1.75-inch opening.
Check under the counter for plumbing obstacles, water lines, electrical boxes, or cabinet framing. You want a clear, straight path between the dishwasher’s drain port and your air gap. If the angle is too steep or shallow, water won’t drain properly and sediment will collect inside the air gap, causing clogs over time.
Step-by-Step Installation Instructions
1. Turn Off the Dishwasher and Lay Down Towels
Shut off power at the breaker or unplug the dishwasher. Open the cabinet door below the sink and place towels on the floor. You’ll likely spill standing water from the old hose, so prepare for mess.
2. Disconnect the Old Drain Hose
Locate where the dishwasher’s drain hose connects to the garbage disposal outlet, air gap, or sink drain. Use an adjustable wrench to loosen the hose clamp, don’t remove it yet, just loosen enough to slide the hose off. Let any remaining water drain into a bucket or towel. Some water will still drip, so keep towels ready.
3. Install the Air Gap on the Countertop
If drilling a new hole, use a 1.5-inch hole saw at low speed (around 400 RPM) to avoid cracking. Stop occasionally to clear dust. Once the hole is drilled, wipe away debris and dry the area completely.
Insert the air gap’s collar from above. The rubber gasket should sit against the underside of the counter. Thread the mounting nut underneath (if your model requires one) and hand-tighten first. Use an adjustable wrench to snug it, firm but not over-tight, or you’ll compress the gasket unevenly.
4. Connect the Dishwasher Drain Hose to the Air Gap
Connect your dishwasher’s existing drain hose to the upper inlet port of the air gap. Use a hose clamp, tighten it with a screwdriver until snug, but don’t over-tighten or you’ll damage the hose. The hose should be secure with little to no slack.
5. Connect the Outlet Hose to the Sink Drain
Attach a new short hose (usually 12 to 18 inches long) from the air gap’s lower outlet port to your sink’s drain tailpiece or to the inlet of the garbage disposal. Again, use a hose clamp and tighten snugly. If connecting to a disposal, make sure the inlet port is clear and not blocked.
6. Check All Connections and Test for Leaks
Before powering the dishwasher back on, visually inspect all hose clamps and connections. Tighten any that look loose. Wipe away any caulk residue or debris around the air gap base.
Testing Your Installation and Troubleshooting Common Issues
Run a Short Cycle
Power the dishwasher back on and run a 5- to 10-minute rinse cycle. Watch the air gap from above, you should see water flowing down through the center tube and into the outlet hose. If water sprays out the sides immediately, the outlet hose is clogged or kinked. Stop the cycle, straighten the hose, and try again.
Check for Leaks
Under the sink, look for drips around the hose clamps or at the air gap base. Small weeps are normal during the first few minutes: they usually stop as gaskets settle. If water streams out, tighten the hose clamps a quarter turn. If the leak is at the air gap base, remove it, dry the counter, apply silicone caulk around the collar, and reinstall.
Common Issues and Fixes
If the dishwasher drains slowly or backs up, the outlet hose is likely kinked or the sink drain is blocked. Straighten the hose and check that your sink drains freely (run the faucet). If you have a garbage disposal, make sure it’s working and that the air gap inlet port isn’t clogged with food debris.
Water pooling inside the air gap cylinder indicates a siphon issue, the outlet hose is too low or the drain line has high resistance. Raise the outlet hose exit point or check for bends that restrict flow. A professional plumber can help if drain line issues persist.
According to practical guides from Family Handyman, most installation problems are solved by confirming the outlet hose has a gentle downward slope with no traps or kinks.
Maintenance Tips for Long-Term Performance
An air gap requires minimal maintenance, but a few preventive habits keep it working smoothly.
Monthly Inspection
Wipe the air gap’s exterior once a month with a damp cloth to remove dust. Debris on the outer chamber isn’t harmful, but it looks neglected. If you spot mineral buildup (white or tan crusty deposits), soak a cloth in white vinegar and wipe the exterior. This is cosmetic but helpful in hard-water areas.
Clean the Interior Annually
Once a year, remove the air gap’s top cover (usually held by a single screw or a snap-fit collar). Inside, you’ll find a small mesh screen or baffle. Rinse it under warm water to flush out any trapped sediment or grease. A soft brush clears stubborn buildup. Reassemble and replace the cover, it takes two minutes and prevents slow drains.
Monitor Hose Clamps
Every six months, hand-tighten hose clamps if they’ve loosened. Over time, vibration and temperature cycling can relax the fit. A quick quarter-turn every six months prevents slow leaks that go unnoticed until they damage cabinet wood.
Replace Worn Hoses
Dishwasher drain hoses last 5 to 7 years. If you notice cracks, bulges, or persistent odors coming from the hose, replace it. Using DIY resources like Instructables can guide you through a hose-only swap if your air gap is already installed, it’s even faster than the initial installation.
Conclusion
A dishwasher air gap installation is a straightforward project that takes less than an hour and protects both your dishwasher and your family’s health. By following code requirements and proper positioning, you ensure reliable drainage and compliance with local building standards. Keep hose clamps tight, check connections annually, and the air gap will serve quietly for years. If you encounter persistent drain issues or need contractor estimates for complex kitchen plumbing, professional reviews on Angi can connect you with vetted local plumbers in your area.