
Table of Contents
ToggleYour Roomba isn’t moving across the floor like it used to, and the battery indicator keeps flashing red. Before you toss the robot vacuum in the closet or shell out for a brand-new unit, stop, replacing the battery might be all you need. A worn iRobot Roomba battery is one of the most common issues homeowners face with robotic vacuums, and the good news is that swapping it out is straightforward. This guide walks you through identifying when replacement is necessary, finding the right battery for your model, and installing it properly so your Roomba runs at full capacity again.
Key Takeaways
- iRobot Roomba battery replacement typically costs $50–$200 and restores near-new cleaning performance, making it far more affordable than buying a new unit.
- Watch for warning signs like reduced run time under 60 minutes, red battery indicator lights, or sluggish navigation to know when your Roomba battery needs replacement.
- Before purchasing a replacement battery, identify your exact Roomba model number and consult the owner’s manual to ensure compatibility and avoid damage to your robot.
- The battery replacement process takes 10–20 minutes and requires only a Phillips screwdriver—unplug your Roomba first, then disconnect the old battery connector, remove it, and slide the new battery into place.
- Extend your new battery’s lifespan to 3+ years by keeping the Roomba on the dock when not in use, storing it in cool temperatures, running it weekly, and cleaning charging contacts monthly.
Understanding Roomba Battery Life and When Replacement is Needed
A typical iRobot Roomba battery lasts between 2 and 3 years, depending on usage frequency and charging habits. Most Roomba models use lithium-ion batteries, which hold a charge well but eventually lose their capacity, just like the battery in your smartphone. The battery degrades through normal charging cycles, so even if you maintain your Roomba perfectly, the battery itself will eventually need replacing.
Knowing when to replace the battery saves frustration and keeps your floors clean. If your Roomba runs for only 30 minutes instead of its rated 90 minutes, or if it struggles to climb onto rugs, the battery is likely exhausted. The good news is that a battery replacement often costs far less than buying a new unit.
Identifying Battery Degradation Signs
Don’t wait for your Roomba to fail completely. Watch for these warning signs that replacement is approaching. The most obvious indicator is reduced run time, if your Roomba barely completes a single room before returning to the dock, the battery can no longer hold a full charge. A healthy battery should power your Roomba for at least 60 minutes on most models: anything less suggests it’s time to replace it.
Another clue is the battery indicator light. If the light blinks red continuously after a full charge cycle (usually indicated by flashing amber during charging), the battery is failing. Some newer models display battery health directly in the mobile app: check there first before assuming the worst.
Weakness on carpet or uneven floors is another tell. If your Roomba spins its wheels or gets stuck on transitions it handled fine before, insufficient battery power is likely starving the motors. Similarly, if the robot won’t navigate upstairs or over obstacles it used to tackle, the battery isn’t delivering enough current.
Finally, the robot may seem sluggish overall, slower turns, delayed responses to app commands, or failure to complete a full cleaning cycle. These are all classic signs that the battery for iRobot Roomba needs replacement.
Choosing the Right Replacement Battery for Your Model
Not all Roomba batteries are created equal. Different models use different battery types, and installing the wrong one can damage your robot or void the warranty. The most common types are 3000mAh lithium-ion batteries (used in earlier and budget models) and higher-capacity batteries like 4000mAh or 5000mAh found in newer, premium units.
Start by identifying your Roomba model number. You’ll find it on the bottom of the unit or in the battery compartment itself, it usually looks like “Roomba 675,” “Roomba e5,” or “Roomba j7+.” Write this down: it’s essential for finding the correct replacement.
Once you have the model number, visit the official iRobot website or check your owner’s manual to confirm the exact battery specification. The manual lists the correct battery type, voltage (usually 14.4V for lithium-ion), and capacity. Avoid generic “universal” Roomba batteries, they may fit physically but could underperform or damage the charging contacts.
When shopping, you have two options: genuine iRobot batteries or third-party replacements. Genuine batteries cost more (typically $120–$200) but come with manufacturer warranty and guaranteed compatibility. Third-party options run $50–$100 and can work well, but research the seller’s reviews first. Look for verified customer feedback mentioning your specific model.
Check the battery’s warranty period. Reputable replacements offer at least one year of coverage. If a seller offers no warranty or vague promises, buy elsewhere, a cheap battery that dies in three months isn’t a bargain.
Step-by-Step Battery Replacement Instructions
Battery replacement takes 10 to 20 minutes and requires no special skills. The process is nearly identical across most Roomba models, though details may vary slightly, always consult your owner’s manual if you’re unsure.
Tools and Materials You’ll Need
- Replacement battery (correct model for your Roomba)
- Phillips head screwdriver (usually size #1 or #2)
- Soft cloth or brush for cleaning
- Small bowl or container for screws (they’re tiny, don’t lose them)
- Safety glasses (optional but recommended: battery acid is a concern if the old battery is damaged)
Important: Before starting, unplug your Roomba or let it dock fully. Never work on the battery while the robot is powered on or connected to the charger.
Step 1: Access the Battery Compartment
Flip your Roomba upside down and locate the battery compartment, usually on the bottom or underside. Most models have a removable cover held by one to three Phillips head screws. Remove these screws carefully and set them aside in your bowl so they don’t roll away.
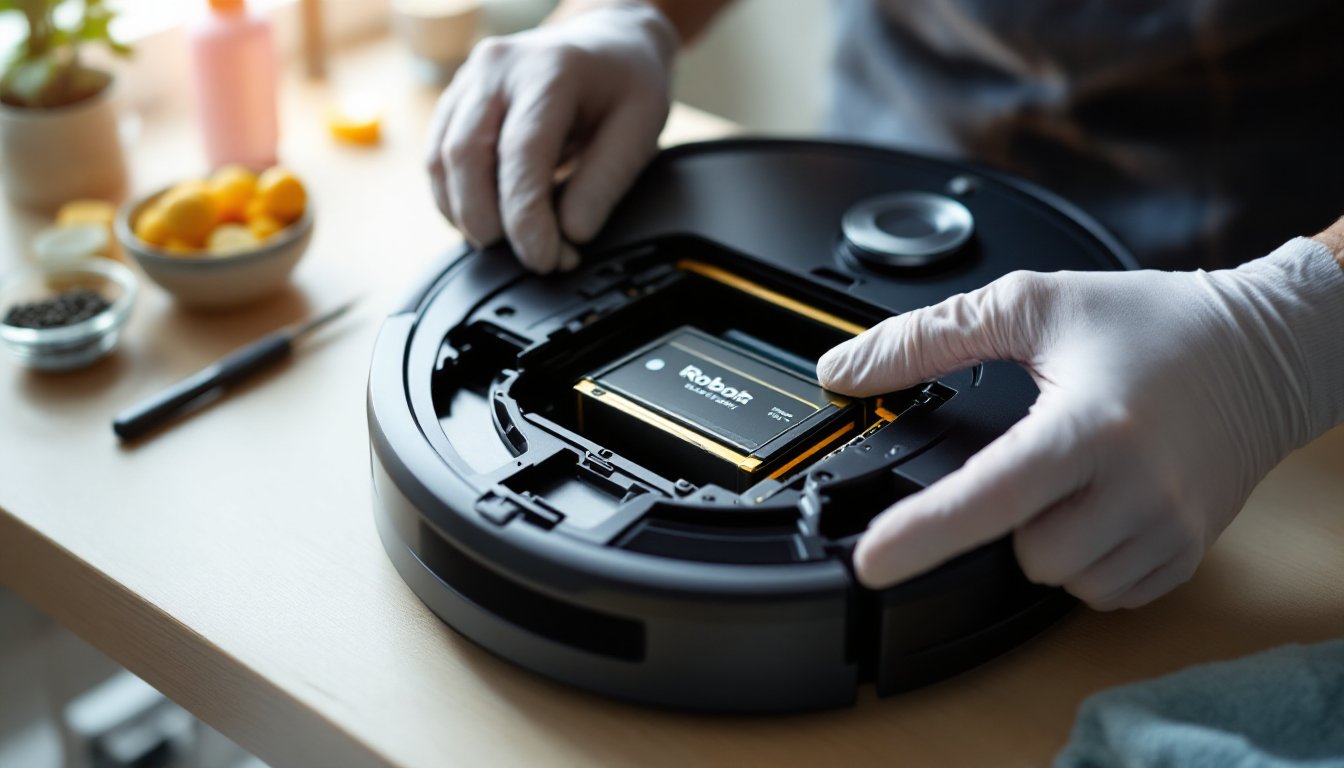
Step 2: Disconnect the Old Battery
Lift the compartment cover. You’ll see the battery connected to the robot by a plastic connector. This connector simply pulls out, no soldering or special tools needed. Gently wiggle the connector side to side while pulling it free from the battery terminals. Don’t force it: they’re designed to release with light pressure.
Step 3: Remove the Old Battery
The battery is usually held in place by clips or a simple slide-out mechanism. Release the clips on either side (if present) and slide the battery toward you to remove it. Some models require a gentle lift-and-slide motion. The battery should come free without resistance: if it doesn’t, check for additional fasteners.
Step 4: Install the New Battery
Slide the new battery into the compartment, aligning it exactly as the old one sat. The orientation matters, the connector should face the correct direction. Line up the plastic connector and press it firmly onto the battery terminals until you hear a satisfying click. The connection should be snug and secure.
Step 5: Reassemble and Test
Replace the compartment cover and secure it with the screws you removed. Tighten them hand-tight, don’t over-torque, as you can crack the plastic. Place your Roomba on the dock to charge. The charging light should turn amber, indicating a charge cycle is underway. Let it charge fully (usually 2–3 hours) before running the robot.
Once charged, press the CLEAN button and watch your Roomba run for a few minutes. It should move smoothly and respond to commands. If it starts but immediately returns to the dock, the battery may not be fully charged, give it another hour and try again. If the robot still won’t run, double-check that the connector is fully seated on the battery terminals.
Resource guides like those on CNET’s Roomba battery replacement offer additional model-specific details and troubleshooting if you encounter issues.
Extending Your New Battery’s Lifespan
Your new Roomba battery will degrade over time, that’s inevitable with lithium-ion technology. But, following a few best practices will stretch its useful life to 3+ years or more.
Charge properly. Leave your Roomba on the dock when not in use rather than storing it unplugged. The dock maintains a trickle charge that keeps the battery healthy. Avoid letting the battery drain completely: schedule cleaning sessions regularly so the robot charges at least weekly.
Keep it cool. Heat accelerates battery degradation. Store your Roomba in a temperature-controlled area (60–75°F is ideal) and avoid leaving it in hot cars, sunny rooms, or near heat sources. If your home gets very hot in summer, consider keeping the dock in a cooler corner.
Use it regularly. Paradoxically, a battery that sits unused degrades faster than one cycled through regular charges. Run your Roomba at least once per week, even if your floors are clean. This steady use keeps the battery healthier than months of storage followed by sudden heavy demand.
Clean the charging contacts. Dust and debris on the dock’s charging contacts or the battery connectors reduce charging efficiency. Every month, wipe the dock’s charging points with a soft, dry cloth. Check the battery terminals inside your Roomba for any oxidation and gently clean them with a dry cloth if needed.
Avoid overcharging. Modern Roombas have charging protection that stops charging once full, so leaving it docked indefinitely won’t harm the battery. But, if your unit is very old, check the manual, older models may not have this safety feature.
Following these steps can significantly slow battery degradation. Many users report that their replacement batteries perform well beyond the 2–3 year baseline.
Cost Comparison: Replacement vs. New Robot
Before you buy a replacement battery, do the math. A new battery for your Roomba typically costs $50–$200, depending on capacity and whether you choose genuine or third-party options. A brand-new Roomba ranges from $200 (entry-level models) to $1,000+ (premium models with advanced features like auto-empty bins and AI navigation).
If your Roomba is less than 5 years old and works well otherwise, battery replacement almost always makes financial sense. You’re getting most of the cleaning performance of a new unit for a fraction of the price. But, if your robot is older, has other failing components, or your cleaning needs have changed significantly, a new model might be worth considering.
Consider also the environmental impact. Replacing a battery is far more sustainable than landfilling an entire robot and purchasing a new one. Lithium-ion batteries should be recycled properly, so when your replacement eventually wears out, take it to a local e-waste recycling facility rather than throwing it away.
For most homeowners, a new battery for iRobot Roomba is the smart choice. You’ll restore your robot to near-new performance, maintain your current cleaning routine, and avoid the disruption of learning a new model’s app or features. Get the most value from your investment before upgrading to your next Roomba.